


That angry red bump next to your nose piercing wasn’t part of the plan. You followed the aftercare instructions, kept it clean, and somehow still ended up with this frustrating little intruder that’s making your fresh piercing look anything but perfect.
Here’s what we’ll cover:
- What irritation bumps actually are
- The most common causes that trigger these bumps
- Proven treatment methods that actually work
- Prevention strategies to stop them from coming back
- When to seek professional help vs. home remedies
At Loyal 2 The Coil, our experienced piercers like Casey and Cristen see irritation bumps regularly and know exactly how to help clients get back on track. We’ve guided hundreds of Fort Myers and North Fort Myers clients through successful healing processes.
What Irritation Bumps Actually Are
That angry red bump next to your nose piercing isn’t what most people think it is. It’s not an infection, keloid, or sign that your body is rejecting the jewelry. It’s an irritation bump – your skin’s way of saying “something’s bugging me here.”
Irritation bumps are clusters of inflammatory tissue that form when your piercing gets repeatedly disturbed or irritated. Think of them as your body’s overprotective response to ongoing trauma in the area.
The Science Behind the Bump
When your piercing faces constant friction, movement, or harsh cleaning products, your immune system kicks into overdrive. It sends extra blood flow and healing cells to the site, creating that puffy, reddish bump we all dread seeing.
The good news? These bumps are completely treatable and preventable. Unlike keloids (which are genetic and permanent), irritation bumps will disappear once you remove the source of irritation.
How to Identify Nose Piercing Bumps
Key characteristics include:
- Pink to red coloration
- Soft or squishy texture when touched
- May leak clear or slightly bloody fluid
- Develop weeks or months after the initial piercing
- Often appear on just one side of the piercing hole
Irritation Bump vs. Other Complications
| Irritation Bump | Infection | Keloid |
|---|---|---|
| Soft, squishy texture | Hot, throbbing pain | Hard, raised scar tissue |
| Clear/light discharge | Yellow/green pus | No discharge |
| Appears gradually | Sudden onset | Grows beyond piercing site |
| Treatable at home | Needs medical attention | Requires professional treatment |
The bump might look scary, but it’s actually your body trying to heal itself – it just needs the right guidance to do it properly.
The Most Common Causes That Trigger These Bumps
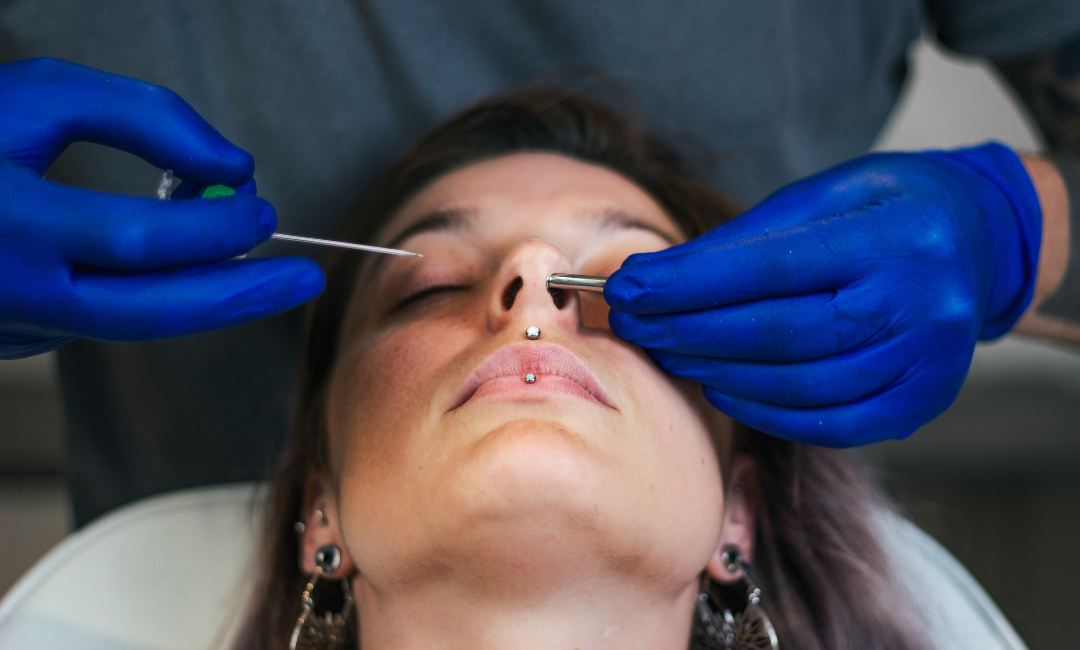
When your body piercing isn’t done properly, you’re already fighting an uphill battle. Poor piercing technique creates the perfect storm for nose piercing bumps to develop.
Here’s what goes wrong:
- Wrong angle placement forces jewelry to sit unnaturally
- Blunt or dull needles cause excessive tissue trauma beyond the initial injury
- Improper jewelry sizing creates constant pressure on healing tissue
- Non-sterile conditions introduce bacteria from the start
Your Hands Are Enemy Number One
Dirty hands touching your new piercings rank as the top cause we see. Every time you touch that piercing area without clean hands, you’re introducing bacteria and causing micro-trauma that leads to bump formation.
The habit starts innocently – checking if it’s healing, adjusting the jewelry, or absent-mindedly touching your new nose piercing. But those dirty hands carry oils, bacteria, and debris that your healing tissue can’t handle.
Jewelry Problems That Cause Chaos
The wrong jewelry material triggers allergic reactions in sensitive skin. Your body treats certain metals like foreign invaders, creating inflammation that can take up to six months to fully heal.
Common jewelry culprits:
- Surgical steel (contains nickel)
- Plated jewelry that flakes off
- Too-small jewelry that embeds in tissue
- Low-quality metals that oxidize
Aggressive Cleaning Routines Backfire
Over-cleaning actually prevents healing. Many people think more cleaning equals faster healing, but harsh products and excessive scrubbing do the opposite.
Cleaning mistakes that cause piercing bumps:
- Using alcohol or hydrogen peroxide
- Scrubbing with cotton swabs
- Rotating jewelry during cleaning
- Cleaning more than twice daily
Sleep Position and Fabric Friction
Your pillowcase becomes a breeding ground for bacteria and snags your jewelry nightly. Side sleepers with new nose piercings often develop bumps on the side they sleep on.
Clothing, hair, and masks also create constant friction against the piercing area, preventing tissue from settling into its healing rhythm.
Product Buildup and Chemical Exposure
Hair products, makeup, and skincare routines introduce chemicals your healing piercing wasn’t designed to handle. These products can feel itchy, cause the area to bleed easily, and prevent proper drainage.
Even switching to new products can trigger developing bumps if your skin reacts poorly during the sensitive healing phase.
Proven Treatment Methods That Actually Work
Leave It The Hell Alone – this isn’t just piercer slang, it’s the gold standard for treating nose piercing bumps. Your body knows how to heal; it just needs you to stop interfering with the process.
What LITHA looks like in practice:
- Stop touching, twisting, or moving the jewelry
- Wash your hands before any necessary contact
- Let water run over it in the shower – that’s it
- Resist the urge to “check” healing progress
This method allows inflammation to reduce naturally without additional trauma to the piercing area.
Saline Solution: Your New Best Friend
Sterile saline solution beats homemade sea salt solutions every time. The premade versions maintain perfect pH balance and salinity levels that won’t irritate healing tissue.
How to use saline properly:
- Spray directly on the bump 1-2 times daily
- Let it air dry – no wiping or patting
- Use only sterile saline (not contact lens solution)
- Continue until the tissue can fully heal
Avoid sea salt solutions mixed at home – getting the ratio wrong can actually make bumps worse and delay healing up to six months.
When Professional Treatment Becomes Necessary
Some bumps need medical intervention beyond home care. Hypertrophic scars and keloid scars require different approaches than simple irritation bumps.
Medical Treatment Options
| Treatment Type | Best For | Timeline | Success Rate |
|---|---|---|---|
| Steroid injections | Hypertrophic scars | 4-6 weeks | 70-80% |
| Laser therapy | Keloid scars | Multiple sessions | 60-90% |
| Surgical excision | Large keloids | Single procedure | Varies |
| Surgical removal | Persistent bumps | 1-2 hours | 85-95% |
The Chamomile Tea Compress Method
This gentle anti-inflammatory approach works for mild irritation bumps that feel itchy or bleed easily. Chamomile contains natural compounds that reduce inflammation without harsh chemicals.
Simple chamomile treatment:
- Steep quality chamomile tea for 5 minutes
- Let cool to a lukewarm temperature
- Apply with a clean cotton pad for 5-10 minutes
- Use once daily, maximum
What NOT to Do During Treatment
These common “treatments” make bumps worse:
- Tea tree oil (too harsh for new piercings)
- Aspirin pastes or crushed tablets
- Hydrogen peroxide or rubbing alcohol
- Antibiotic ointments that trap bacteria
- Hot compresses that increase swelling
Timeline Expectations for Different Body Piercing Bump Types
Irritation bumps typically respond to proper care within 2-4 weeks. Hypertrophic scars may take 2-3 months with consistent treatment. Keloid scars often require professional treatment options and can take 6+ months to resolve.
The key is identifying your bump type early and choosing the right approach. At Loyal 2 The Coil, our experienced piercers can help determine whether your bump needs professional attention or will respond to conservative home care.
Patience wins the healing game. Most people see improvement within the first week of proper treatment, but complete resolution takes time.
Prevention Strategies to Stop Them From Coming Back
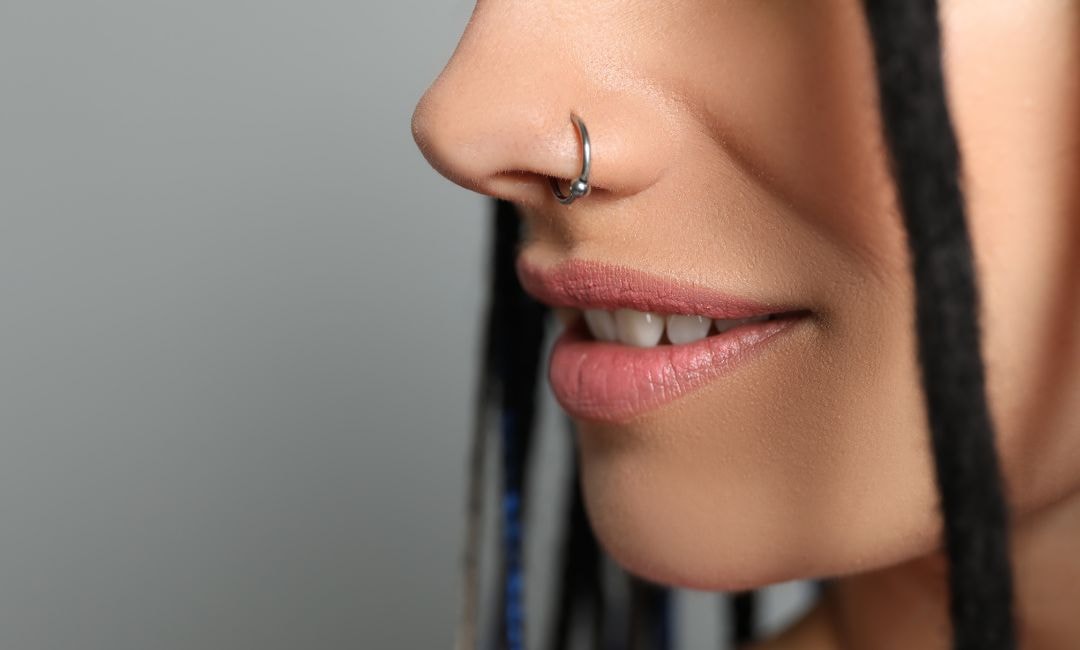
Prevention starts the moment you leave the piercing studio. The first several weeks determine whether you’ll deal with recurring bumps or enjoy smooth healing for several months ahead.
Your daily routine to prevent nose piercing bumps:
- Wash your hands thoroughly before any contact
- Use only sterile saline spray twice daily
- Sleep on the opposite side or use a travel pillow
- Keep hair products and makeup away from the piercing
Recognize Early Warning Symptoms
Catching problems early prevents major complications. Most people ignore the subtle symptoms that signal trouble brewing beneath the surface.
Red flags to watch for:
- Persistent redness beyond normal healing
- Tissue that feels warm or becomes painful
- Any bleeding that starts after initial healing
- Swelling that looks like a pimple forming
Don’t wait several weeks hoping these symptoms disappear – address them immediately to reduce your risk of bump formation.
Choose the Right Jewelry From Day One
Quality jewelry prevents 80% of piercing complications. Your initial jewelry choice impacts healing for months, so investing in proper materials pays off long-term.
Prevention-focused jewelry choices:
- Implant-grade titanium or 14k+ solid gold
- Proper length to accommodate swelling
- Smooth, polished surfaces that won’t snag
- Threadless or internally threaded ends
Environmental Protection Strategies
Your surroundings impact healing more than you realize. Simple environmental changes can make the difference between problem-free healing and chronic irritation.
Daily protection tactics:
- Change pillowcases twice weekly
- Avoid swimming pools and hot tubs
- Use a clean tissue barrier when applying makeup nearby
- Keep your cell phones clean if they touch your face
The 6-Month Rule for Activities
High-risk activities should wait until complete healing. Even if your piercing looks healed after several weeks, internal healing continues for 6+ months.
Activities to postpone:
- Contact sports or activities with impact risk
- Sleeping on the pierced side regularly
- Changing jewelry before full healing
- Excessive sun exposure that causes inflammation
When to Consult Professionals
Some situations require expert intervention before they become bigger problems. Knowing when to see a doctor or dermatologist can save you months of frustration.
Seek professional help for:
- Symptoms that worsen after 48 hours of proper care
- Signs of infection (green/yellow discharge, fever)
- Bumps that don’t respond to conservative treatment
- Any wounds that develop around the piercing site
Long-Term Maintenance Success
Prevention becomes a lifestyle, not a temporary phase. Clients who stay bump-free long-term follow specific habits that keep their piercings healthy.
Monthly maintenance checklist:
- Inspect jewelry for damage or loosening
- Clean jewelry with saline if needed
- Monitor for any new redness or sensitivity
- Replace makeup brushes that contact the area
The Psychology of Prevention
Mindset matters in piercing care. People who approach healing with patience and consistency get rid of problems faster than those who constantly worry or over-treat.
Mental strategies that work:
- Focus on what you can control (cleaning routine)
- Avoid comparing your healing to others online
- Trust the process – healing takes time
- Document progress with photos to see improvement
At Loyal 2 The Coil, clients who follow these prevention strategies experience significantly fewer complications. Our piercers emphasize that consistency beats intensity – small daily habits prevent major problems down the road.
Bottom line? Prevention requires more effort up front, but saves you painful treatment later. Most piercing bumps are completely preventable with the right approach from day one.
When to Seek Professional Help vs. Home Remedies
Try home remedies first when:
- Small, soft bump with gradual onset – appeared slowly over days/weeks, feels squishy to touch, and shows no signs of infection
- Light pink or red coloration only – normal inflammatory response without dark discoloration, streaking, or unusual colors
- Clear or slightly bloody discharge – normal healing fluid without thick, colored, or foul-smelling pus
- No fever or systemic illness – you feel fine overall with no body aches, chills, or general unwellness
- Responds positively to gentle care – shows improvement within 72 hours of proper saline treatment and LITHA method
Seek professional help immediately for:
- Signs of serious infection – green/yellow pus, red streaking from the piercing site, fever, or feeling sick overall
- Rapid growth or hot sensation – bump grows quickly, feels warm/hot to touch, or causes severe throbbing pain
- Persistent bleeding or trauma – won’t stop bleeding with gentle pressure, or develops multiple bumps around the piercing
- No improvement after proper care – home treatment fails after 1 week, or symptoms actively worsen despite correct aftercare
- Suspicious changes in appearance – dark coloration, hard texture, or growth beyond the piercing site boundaries
Start with saline and LITHA for 3-5 days. If you’re questioning whether it’s serious, contact Loyal 2 The Coil or your healthcare provider – professional assessment beats guessing games.
Ready to Get Expert Piercing Care at Loyal 2 The Coil?
Irritation bumps don’t have to derail your piercing journey. With the right knowledge and consistent care, you can prevent most complications and treat minor issues before they become major problems.
Key takeaways to remember:
- Irritation bumps are treatable inflammation, not permanent damage
- Most bumps result from touching, poor jewelry, or aggressive cleaning
- LITHA method and sterile saline solve 90% of bump issues
- Prevention through proper aftercare beats treatment every time
- Seek professional help for signs of infection or persistent problems
At Loyal 2 The Coil, our experienced piercers see these issues daily and know exactly how to guide you through successful healing. Whether you need expert piercing services at our North Fort Myers or Edison Mall locations, or just advice on treating an existing bump, our team has the expertise to help you achieve the healthy, beautiful piercing you wanted from day one.
Frequently Asked Questions
How do you get rid of the irritation bump on your nose piercing?
Use the LITHA method (Leave It The Hell Alone) and spray with sterile saline solution 1-2 times daily. Stop touching, twisting, or over-cleaning the piercing. Most bumps disappear within 2-4 weeks with proper care.
Should I take a piercing out if I have an irritation bump?
No, don’t remove the jewelry. Taking it out can trap infection inside and cause the hole to close with the bump still present. Keep the jewelry in and focus on gentle aftercare instead.
Will the bump on my nose piercing ever go away?
Yes, irritation bumps are temporary. With proper care, they typically resolve within 2-4 weeks. However, keloids or hypertrophic scars may require professional treatment and take several months to improve.
How do I get rid of a keloid on my nose piercing?
Keloids need professional treatment. Options include steroid injections, laser therapy, or surgical removal. See a dermatologist for proper diagnosis and treatment plan – home remedies won’t work on true keloids.


